How To Use Finishing Salt On Vegetables
A shaved fennel salad with a fresh, aniseed flavour and a clean bite.
Green beans with a firm snap and a clean, green bite.
Roasted carrots with edges that turn sweet and slightly dark.
Vegetables don’t take seasoning in the same way. Some release water as soon as they’re cut. Others soften, concentrate, or hold their shape. That determines how salt lands, and whether it sharpens or fades.
This guide shows how to use finishing salt on vegetables across different preparations, including when to add it, how much to use, and which salts work best for each case.
Looking for a specific vegetable? Jump directly:
High-water, fast-cooking vegetables
Release moisture quickly and can wash out flavour if salted too early. Timing controls intensity.
Dense, sweet, slow-cooking vegetables
Build depth over time as heat and salt draw out natural sugars. Rushing them keeps them flat.
Cruciferous & structured vegetables
Tight fibres that open with heat and salt, developing a deeper, more savoury profile.
Crisp, fresh vegetables
Salt sits on the surface. Small changes in timing shift them from bright to flat.
Starchy vegetables
Absorb salt into their structure and need more than expected to taste fully seasoned.
For potatoes, see our Guide How To Use Finishing Salt On Potatoes.
Aromatics & intensity builders
Used in small amounts, but salt integrates and carries their flavour through the dish.
Mineral & ocean vegetables
Naturally saline. Precision matters or the balance tips quickly.
Specialty textures
Unusual structures that require control to manage texture and flavour release.
Principles Of Salt And Vegetables
Using finishing salt on vegetables comes down to a few variables. Once you see them, the differences become predictable.
Salt on vegetables follows four variables:
- Moisture
- Heat
- Timing
- Bitterness & Sweetness
Salt draws moisture out. On some vegetables this helps concentration and browning. On others, especially leafy ones, it softens structure too quickly.
Heat melts salt into oils and natural sugars. Cooling keeps it on the surface.
Early salting spreads flavour. Late salting creates contrast.
Salt also reduces bitterness and sharpens natural sweetness, especially after roasting.
How this plays out in practice is simple:
- Raw vegetables either stay crisp or begin to cure depending on timing.
- Cooked vegetables either hold salt at the surface or dissolve it into moisture.
- Dry, hot surfaces create contrast. Wet surfaces create even seasoning.

For a deeper explanation see How Salt Changes The Taste of Food, which covers the food science behind salt.
What changes per vegetable is how these variables play out in practice. Below, we apply the principles to different vegetables and show how timing, moisture, and structure shape the result, when to add finishing salt, how much to use, and which finishing salt pairs best.
Understand Finishing Salt More Deeply
At Maison Kojira, we develop culinary salts with different crystal structures, mineral profiles, and flavour infusions. The guides mentioned below explain finishing salt itself in more detail. They’re worth it if you want to know the details behind everything.
→ How Chefs Use Finishing Salt
Techniques for timing, layering, and application
→ Guide to Finishing Salt: Types and Uses
What finishing salt is, what different types there are and what defines a great finishing salt
→ How Salt Changes Flavour
How salt changes the taste and flavour of food, and the science behind it
→ Umami Salt Explained
How fermented salts add depth and savoury intensity
On the pages below we will explain one by one how to use finishing salt on the most common vegetables.
How to Use Finishing Salt on Tomatoes
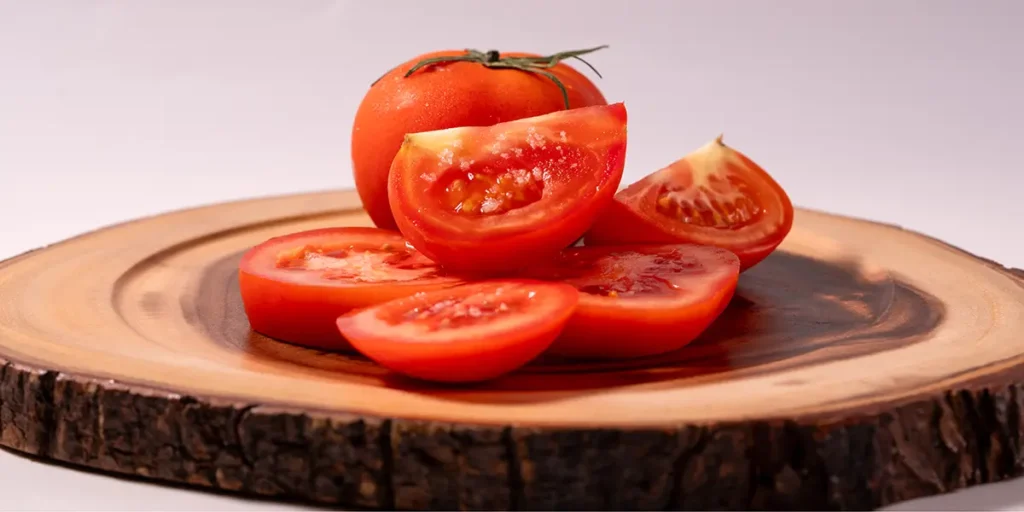
Tomatoes need timing more than force.
Salt early when you want the tomato to release juice for burrata, bread, olive oil, herbs, or salad. Salt late when the tomato is already ripe and you want clean slices for toast, sandwiches, caprese, or a simple plate.
For roasted or grilled tomatoes, salt early to help them reduce and deepen, then finish with a small pinch at the end if they need brightness.
Best finishing salts for tomatoes: artisan mineral salt for clarity, preserved lemon salt for brightness, black garlic salt for roasted tomatoes, and saffron salt for warm tomato dishes.
Salt Rule: salt early for tomato juice. Salt late for clean slices.
👩🏽🍳 Read the full guide: How to Salt Tomatoes
Enjoy guides like this?
Receive flavour insights, rare kitchen notes, and early access to limited Maison Kojira releases.
How to Use Finishing Salt on Zucchini
Zucchini is all about water and freshness.
Slice it raw and it feels cool, almost crisp at first, then soft. Cook it and it relaxes quickly. Edges turn silky, the centre is delicate, the flavour mild with a faint sweetness.
It stays mild and takes on what you add.
Add it too early and zucchini releases water, softens, and loses definition. Add it at the right moment and the surface tightens slightly, the flavour becomes clearer, and the texture holds together.
Raw Zucchini
Raw zucchini contains a lot of water. Salt draws moisture to the surface within minutes. The texture softens and the flavour spreads.
This can be used intentionally or avoided.
When to add finishing salt on raw zucchini: Just before serving for freshness, or a few minutes earlier to soften and lightly cure.
How much salt to use: A light pinch.
Best finishing salts for raw zucchini:
- fine mineral salt: evens out seasoning and gives structure to an otherwise soft texture
- light citrus salts (e.g. preserved lemon salt): for dressed zucchini with olive oil, adds lift and keeps the flavour from feeling flat
- green herb salt (parsley, chive): for raw zucchini salads, adds freshness without overpowering the base
👨🏼🍳 Chef tip
Slice zucchini first, then salt – not the other way around. Whole zucchini releases water unevenly. Sliced surfaces give you control.
Roasted, Grilled and Pan-Cooked Zucchini
When to add finishing salt on roasted and grilled zucchini: At the end, once excess moisture has evaporated and the surface begins to brown.
How much salt to use: A light pinch.
Best finishing salts for roasted and grilled zucchini:
- mineral finishing salt
- a small amount of citrus salt
- a very restrained amount of umami salt such as black garlic salt
👨🏻🍳 Common mistake
Salting too early in the pan.
Zucchini releases water first. Salt pulls more out, and you end up steaming instead of browning.
Boiled and Steamed Zucchini
Zucchini absorbs and holds water easily. The surface stays wet, and salt added at the end dissolves immediately, unless you add some fat after cooking.
When to add finishing salt on boiled or steamed zucchini: Salt the water during cooking. Finish very lightly in case you finish with oil or butter, otherwise its better to skip it.
How much salt to use: Moderate salinity in the water; minimal finishing salt.
Best finishing salts for boiled or steamed zucchini:
- mineral salt (in cooking water): seasons the zucchini from within and prevents it from tasting diluted
- fine mineral finishing salt (optional): used very lightly after draining, only if finished with oil or butter
👨🏼🍳 Food science insight
Zucchini absorbs very little salt after cooking. If the water isn’t seasoned, the inside stays bland no matter what you add later.
How to Use Finishing Salt on Aubergine or Eggplant
Aubergine is one of those vegetables that can become extraordinary or disappointing very quickly.
Salt it before cooking when you want thick slices, roasted cubes, fried pieces, parmigiana, caponata, or BBQ aubergine to brown properly instead of turning wet or greasy. Give it time, pat it dry, then let the heat, oil, and herbs do their work.
Skip early salting when you want the flesh soft, silky, and spoonable. For dips, stews, curries, miso-style aubergine, or whole-roasted aubergine, that softness is the point.
Best finishing salts for aubergine: black garlic salt for roasted or grilled aubergine, preserved lemon salt for yoghurt, tahini, herbs, and tomato, artisan mineral salt for clarity, and fermented mushroom salt for darker savoury dishes.
Salt Rule: salt before cooking for structure and browning. Finish after cooking for contrast.
👨🏽🍳 Read the full guide: Do You Need to Salt Aubergine or Eggplant Before Cooking?
How to Use Finishing Salt on Mushrooms
Mushrooms are built around umami, but they express it differently depending on how you cut and cook them. Raw, they’re clean and subtle. Slightly nutty, lightly earthy, with a firm bite that softens as you chew. Slice mushrooms thin and they become almost delicate, picking up seasoning quickly.
Cook them and the flavour concentrates. It turns richer, more savoury, almost meaty, with a gentle sweetness underneath. The texture shifts from firm to tender, sometimes silky, sometimes with crisp edges. They take on fat and seasoning as they cook. Oil, butter, and salt move into the flesh as moisture leaves, carrying their flavour deep into the mushroom.
Salt intensifies the savoury depth and highlights the shift from moist to browned, making the soft interior richer and the edges more defined.
Raw Mushrooms
Raw mushrooms are firm, slightly spongy, and carry a subtle earthy flavour. When you add salt to raw mushrooms it sits on the surface at first, then slowly draws out moisture.
When to add finishing salt on raw mushrooms: Just before serving.
How much salt to use: A tiny amount.
Best finishing salts for raw mushrooms:
- fine mineral salt: keeps the flavour clean and defined, works when you don’t want to alter the natural umami
- black garlic salt: adds sweetness and depth that raw mushrooms don’t have on their own
- fermented mushroom salt: reinforces the savoury profile – use only when the mushrooms are sliced thin and served simply, otherwise it becomes heavy
- very light citrus salt such as preserved lemon salt: adds lift and cuts the raw earthiness – useful when serving with oil or in a salad
👨🏽🍳 Why seasoning mushrooms with mushroom salt works
It may sound strange to layer mushroom with mushroom, but mushroom salt doesn’t duplicate flavour – it concentrates it. Raw mushrooms are mild and high in water. Fermented mushroom salt is dense and dry. When used lightly, it fills in what the raw mushroom lacks, making the flavour feel deeper and more complete. The key is control. Too much and it turns heavy. Used sparingly, it sharpens the savoury profile instead of flattening it.
👨🏼🍳 Chef tip
Slice mushrooms thin if serving raw. Thick cuts stay rubbery and don’t take seasoning evenly. Thin slices let salt distribute across the surface and soften the texture slightly.
Roasted, Grilled and Pan-Cooked Mushrooms
When you roast, grill or pan-cook mushrooms, they release a large amount of water first. Only after that cooks off do they start to brown and concentrate.
Salt interacts directly with that phase. If you add it too early you will extend the wet phase, delaying browning. If you add it once the pan dries, it reinforces colour and flavour instead of washing it out.
When to add finishing salt on roasted, grilled or pan-cooked mushrooms: After most of the moisture has evaporated and the surface begins to brown. Finish again lightly at the end.
How much salt to use: A moderate amount.
Best finishing salts for roasted, grilled or pan-cooked mushrooms:
- flaky mineral salt: for contrast on browned surfaces and to keep the flavour clean
- black garlic salt: for deeply roasted mushrooms, reinforces sweetness and savoury depth
- mushroom salt (used lightly): for pan-cooked mushrooms, reinforces umami without masking texture
- herb salt (thyme, parsley): for butter- or oil-finished mushrooms, adds lift and prevents the dish from feeling heavy
👩🏽🍳 Common mistake
Using too much salt at the end. Mushrooms shrink as they cook. What looks like a normal pinch before cooking becomes concentrated after, because the total mass is smaller. If you finish with the same amount again, the salt overshoots and masks the flavour.
Season lightly, taste, then adjust if needed.
Mushrooms Cooked with Fat (Butter or Oil)
Once the mushrooms start to brown, fat coats the surface. Salt follows this shift. It first dissolves in released water, then adheres to the fat-coated surface. Added early, it spreads thin. Added after browning, it stays more concentrated.
When to add finishing salt on mushrooms cooked with fat: Once the water has cooked off and the mushrooms begin to brown. Add a small amount, then adjust at the end.
How much salt to use: Moderate, adjusted at the end.
Best finishing salts for mushrooms cooked with fat:
- mineral salt: for butter- or oil-cooked mushrooms, adds surface contrast and keeps the flavour clean
- black garlic salt: for deeply browned mushrooms, reinforces sweetness and savoury depth
- herb salt (thyme, parsley): for butter-finished mushrooms, adds lift and keeps the dish from feeling heavy
👨🏼🍳 Chef tip
Don’t move the mushrooms too much once they start to brown. After the water has cooked off, they need steady contact with the pan to develop colour. Stirring too often breaks that contact and resets the surface, so you lose both browning and the moment where salt becomes effective.
How to Use Finishing Salt on Spinach
Spinach has a deeper, more mineral taste than most greens. The leaves are thin, soft, and already hold a small amount of moisture. They bruise easily, compress quickly, and don’t offer much resistance when you eat them raw.
Salt doesn’t sit on spinach the way it does on firmer vegetables. It dissolves almost immediately and spreads across the surface. That behaviour is what determines how spinach should be seasoned.
Raw Spinach
Raw spinach is soft, slightly damp, and fragile.
If you sprinkle salt directly onto the leaves, it dissolves instantly and starts pulling out moisture. Within minutes, the surface turns wet and the leaves begin to collapse. That’s why it is better to season the medium, not the leaf.
When to add finishing salt on raw spinach: Salt the dressing first – whether it’s lemon juice, vinegar, olive oil, or something creamy. Toss, then adjust with a very small pinch at the end only if needed.
How much salt to use: Minimal. Spinach carries salt quickly once it’s coated.
Best finishing salts for raw spinach:
- fine mineral salt: for vinaigrettes, distributes evenly without collapsing the leaves too quickly
- citrus salts (e.g. lemon, yuzu): for olive oil–based dressings, brightens and offsets the slight bitterness
- light herb salts (parsley, chive): for creamy dressings, adds freshness without weighing the leaves down
👨🏼🍳 Chef tip
Acid spreads salt fast and evenly. Oil slows it down and coats the leaves. Dairy carries it more slowly and evenly. The choice of medium changes how quickly the spinach absorbs seasoning.
Sautéed and Wilted Spinach
Spinach changes faster here than almost any other vegetable. The moment it hits the pan, it releases water. The leaves collapse, steam builds, and what looked dry turns wet almost instantly. If the heat is high and the pan is open, that moisture cooks off quickly. If not, the moisture stays in the pan and the spinach cooks in its own liquid, leaving it soft and watered down.
Salt follows the water. If you add it too early, it dissolves into the liquid, spreading thin and disappearing into the mass.
When to add finishing salt on sautéed spinach: Start light while moisture is still visible. Once the liquid has cooked off and the spinach has reduced to a dense, glossy mass, adjust with a slightly heavier pinch.
How much salt to use: Light to moderate.
Best finishing salts for sautéed spinach:
- fine mineral finishing salt: for clean, even seasoning on soft, reduced leaves
- citrus salt (e.g. preserved lemon salt): for olive oil–finished spinach, adds lift and cuts through the mineral note
- nut-based salt (sesame, almond): for simple sautéed spinach, adds texture and a subtle toasted contrast
- chilli salt (very light): for garlic or oil-heavy spinach, adds edge and prevents it from feeling flat
👨🏻🍳 Chef tip
Use a wide pan and don’t crowd it. Let the water cook off quickly before adding salt or finishing with oil or butter. If the spinach is still releasing steam, it’s too early.
Blanched and Boiled Spinach
In water, spinach loses structure almost completely. The leaves soften, the fibres relax, and the flavour spreads evenly through the mass. There’s no surface left to hold salt in a distinct way.
Salt works differently here. It doesn’t sit on the spinach. It moves through it.
When to add finishing salt on boiled spinach: Salt the water during cooking. Taste after draining, then add a very small pinch only if the flavour needs tightening.
How much salt to use:
- Moderate in the water
- Minimal after (if any)
Best finishing salts for boiled spinach:
- mineral salt (in cooking water): prevents the spinach from tasting diluted
- citrus salt (e.g. lemon): after draining and squeezing dry, adds lift and brings the flavour back into focus
👨🏻🍳 Chef tip
After blanching, squeeze out excess water before seasoning. A drier surface holds the final seasoning better and keeps the flavour from feeling diluted.
How to Use Finishing Salt on Morning Glory (Water Spinach)
Morning glory is one of the few greens where texture carries the whole dish. The stems stay crisp and almost juicy, while the leaves soften and take on whatever they’re cooked with – garlic, oil, and high heat. When it’s done right, each bite has both: a clean snap from the stem and a soft, coated leaf.
It’s usually cooked fast, over high heat. The leaves collapse almost instantly, water releases, and the window to control flavour is short. Salt has to land at the right moment or it disappears into the liquid in the pan.
Raw Morning Glory (Young Leaves Only)
Used rarely, and only when very young. The stems are crisp and hold their structure. The leaves are softer but still resilient enough to stay intact when handled lightly.
If you sprinkle salt directly onto the greens, it dissolves quickly and starts drawing out moisture from the surface. Season the medium, not the greens.
When to add finishing salt on raw morning glory: Salt the dressing first (lime juice, vinegar, or a light oil), then toss the greens. Add a very small pinch directly only if needed just before serving.
How much salt to use: Very light.
Best finishing salts for raw morning glory:
- fine mineral salt: for sliced stems and leaves, tightens the watery bite and keeps the flavour clean
- citrus salts (especially lime-forward): for dressed salads, cuts the slight metallic edge and sharpens freshness
🧑🏽🍳 Chef tip
Keep the seasoning sharp and minimal. Lime and a small amount of salt is often enough. Too much dressing or salt dulls the natural crispness of the stems.
Stir-Fried Morning Glory
Morning glory is almost always cooked this way. A hot wok, oil, garlic, and then the greens go in. The leaves soften immediately, the stems stay firm, and water releases as soon as they hit the heat. If the wok stays hot, that moisture cooks off quickly and the greens turn glossy, coated in oil and aromatics. If not, the liquid builds and the greens cook in it instead.
Salt follows the water. Add it too early and it dissolves into that liquid. Add it at the end and it lands on the surface, then spreads through the oil and coats the greens.
When to add finishing salt on morning glory: At the end, off heat or just before removing from the wok.
How much salt to use: Light if the pan is still slightly wet. Slightly more once the greens look glossy and dry.
Best finishing salts for morning glory:
- flaky mineral finishing salt: for hot stir-fried morning glory, adds surface contrast and keeps the flavour clean
- citrus salts (lime or preserved lemon): for garlic- and oil-finished dishes, lifts the greens and cuts through richness
- garlic salt: for simple stir-fries, reinforces aroma without needing additional garlic at the end
- chilli salt (very light): for high-heat wok cooking, adds edge and sharpness without masking the vegetable
🧑🏼🍳 Chef tip
Keep the wok hot and don’t overcrowd. You want evaporation, not steaming. If liquid is pooling, the heat is too low or the pan is too full.
Blanched Morning Glory
Blanching gives you a cleaner, more controlled version of the vegetable. The stems soften slightly but still hold some bite. The leaves relax completely and lose the oily coating you get from a wok. The flavour becomes lighter and more even, without the depth from garlic or high heat.
Water changes how salt behaves. Instead of sitting on the surface, it spreads through the greens as they soften. Most of the seasoning happens during or just after cooking, not at the finish.
When to add finishing salt on blanched morning glory: salt the water lightly, then taste after draining. Add a small pinch at the end only if needed.
How much salt to use: light in the water, minimal after.
Best finishing salts for blanched morning glory:
- fine mineral salt: after draining, seasons evenly without clumping on the wet surface
- citrus salt (lime-forward): after draining and dressing, adds lift and sharpens the green flavour
👨🏼🍳 Flavour insight
Water spreads seasoning evenly through the greens, reducing contrast between bites. A small amount of salt at the end brings the flavour back into focus without making it heavy.
How To Use Finishing Salt On Carrots
Carrots taste clean and naturally sweet, with a slight earthiness that sits underneath sugary notes. Raw, that sweetness is light and crisp. Roast or grill them and it deepens quickly, the edges caramelise, and the interior softens into something almost silky. Cook them in water and the flavour stays lighter and more even, with less depth.
They hold their shape as they soften, which gives you control over how far you take them. From slightly firm to fully tender, salt works differently at each stage.
Raw Carrots
Raw carrots are dense and dry on the surface. If you sprinkle salt directly onto them, much of it doesn’t stick. It falls off or stays in isolated spots, so the seasoning feels uneven and disconnected.
Raw carrots need a medium to carry seasoning. Without oil or acidity, salt doesn’t integrate.
When to add finishing salt on raw carrots: Add salt to the dressing first – lemon juice, vinegar, or olive oil – then toss the carrots. Adjust with a very small pinch at the end only if needed. Alternatively, moisten the carrot with juice or all and sprinkle the salt on the surface.
How much salt to use: A very light pinch, distributed evenly.
Best finishing salts for raw carrots:
- fine mineral salt: for shaved or grated carrots, distributes evenly and sharpens the natural sweetness
- citrus salts (lemon or orange-forward): for dressed carrots, adds lift and keeps the sweetness from feeling heavy
- light herb salts (parsley, chive): for fresh carrot salads, adds a green edge and balances the earthy note
👨🏼🍳 Chef tip
Cut matters. Thin slices or shaved carrots hold seasoning better than thick chunks. More surface area gives the salt somewhere to sit and spread.
Roasted, Grilled and Pan-Cooked Carrots
This is where carrots fully open up. Heat draws out their natural sugars. The edges start to caramelise, turning slightly sticky and dark, while the centre softens into a smooth, almost silky texture. The flavour becomes deeper, warmer, and more concentrated.
Fat plays a role here. Oil or butter coats the surface, helping salt spread and cling instead of sitting in sharp spots.
Salt needs to land at the right moment. If added too early, it pulls moisture out before the surface can caramelise. Added at the end, it sits on the warm surface, dissolves lightly into the fat, and spreads evenly across each piece.
When to add finishing salt on roasted, grilled and pan-cooked carrots: After heating, once the carrots are off heat but still warm. Don’t salt straight out of the oven or pan while they’re still steaming heavily. Let them sit briefly so the surface dries slightly. This gives the salt something to cling to instead of dissolving instantly.
How much salt to use: Start light, then adjust after 30–60 seconds once the surface has settled and the sweetness becomes clearer.
Best finishing salts for roasted, grilled and pan-cooked carrots:
- flaky mineral finishing salt: for caramelised carrots, adds surface contrast and keeps the flavour clean
- citrus salts (orange or preserved lemon): for oil- or butter-finished carrots, lifts the sweetness and prevents it from becoming heavy
- black garlic salt: for deeply roasted carrots, reinforces sweetness and adds savoury depth
- mushroom salt (used lightly): for butter-glazed or pan-cooked carrots, adds savoury balance without masking the natural sweetness
- fennel salt: for roasted carrots with olive oil, adds a dry, aromatic lift that sharpens sweetness without adding acidity
🧑🏽🍳 Chef tip
Cutting carrots too thick or unevenly. Large chunks don’t caramelise properly and leave you with sweet centres but underdeveloped surfaces. Without that surface, the salt has nothing to cling to and the flavour stays flat.
Boiled and Steamed Carrots
Cooking carrots in water softens them without building flavour on the surface. They absorb moisture as they cook, but keep their shape. The texture becomes tender and even, and the flavour stays lighter compared to roasting or grilling.
Salt behaves differently here. It needs to be present during cooking to move into the carrot. Added only at the end, it stays mostly on the surface and doesn’t reach the centre.
When to add finishing salt on boiled or steamed carrots: Salt the water during cooking. Taste after draining, then adjust with a small pinch only if needed.
How much salt to use: moderate in the water, minimal after.
Best finishing salts for boiled or steamed carrots:
- mineral salt (in cooking water): seasons the interior and prevents diluted flavour
- citrus salt (lemon or orange): after draining, adds lift and keeps the sweetness from turning flat
🧑🏼🍳 Chef tip
Drain well and let excess steam escape before finishing. A drier surface helps the final seasoning sit more cleanly instead of spreading unevenly.
How to Use Finishing Salt on Pumpkin and Squash
Cut into squash and you feel resistance at first, then it gives way cleanly. Raw, it’s firm, slightly dry, and only lightly sweet. Put it in the oven and everything changes. The edges start to catch and caramelise, while the inside softens into something smooth and almost creamy. The sweetness deepens and becomes rounder, fuller, and more dominant.
That’s the strength – and the risk.
Without enough contrast, it turns soft, sweet, and indistinct. Salt keeps it defined.
Denser squash varieties like butternut or kabocha hold their shape and caramelise more easily. Pumpkin is softer and higher in water, so it needs more control to avoid turning flat or watery.
Raw Pumpkin and Squash
Raw squash and pumpkin are firm, dense, and slightly dry, with a mild sweetness that only comes through when sliced thin.
They don’t carry seasoning easily. If you add salt directly, it stays in isolated spots and doesn’t spread. The flavour feels uneven unless something helps move it across the surface.
Raw squash and pumpkin need to be dressed.
When to add finishing salt on raw squash and pumpkin: Add salt to the dressing first (lemon juice, vinegar, or a light oil), then toss thin slices or shavings. Adjust with a small pinch at the end only if needed.
How much salt to use: Light, but deliberate.
Best finishing salts for raw squash and pumpkin:
- fine mineral salt: for shaved or thin slices, seasons evenly and sharpens the mild sweetness
- nut-based salts (e.g. sesame or almond): for raw salads, add texture and a subtle toasted contrast
- light spice salts (e.g. ginger or mild chilli): for thinly sliced preparations, adds edge and prevents the flavour from feeling flat
🧑🏼🍳 Chef tip
Slice it thin or shave it. Thick raw pieces don’t carry seasoning well. Thin slices let the salt and acid spread instead of sitting on the surface.
Roasted Pumpkin and Squash
This is where squash and pumpkin are at their best. Heat softens the flesh and concentrates the sugars. The edges caramelise, turning slightly sticky, while the inside becomes smooth and almost creamy.
Salt doesn’t stay separate here – it blends into the surface. If you add it too early, it draws moisture out and slows down caramelisation. Added at the end, it settles into the warm surface and spreads through the fat.
When to add finishing salt on roasted squash and pumpkin: At the end, once the surface is lightly caramelised and no longer steaming heavily.
How much salt to use: Moderate. Enough to balance the sweetness without flattening it.
Best finishing salts for roasted squash and pumpkin:
- flaky mineral finishing salt: for soft, roasted flesh, adds surface contrast and keeps the flavour clean
- fennel salt: for oil-roasted squash, adds a dry, aromatic lift that sharpens sweetness without adding acidity
- black garlic salt: for deeply roasted squash, reinforces sweetness and adds savoury depth
- nut-based salt (e.g. sesame): for butter- or oil-finished squash, adds texture and a light toasted contrast
👩🏼🍳 Common mistake
Under-seasoning roasted squash. As the sugars concentrate, the flavour gets sweeter. Without enough salt, it tastes soft and one-dimensional.
Boiled and Steamed Pumpkin and Squash
Squash softens quickly in water and absorbs moisture easily. The texture becomes very uniform: soft all the way through, with little variation between surface and centre.
Salt integrates completely. That makes it evenly seasoned, but also easy to over-soften and flatten.
When to add finishing salt on boiled squash and pumpkin: Salt the water during cooking. Taste after draining, then adjust with a small pinch if needed.
How much salt to use: Moderate in the water, minimal after.
Best finishing salts for boiled squash and pumpkin:
- mineral salt (in cooking water): seasons the interior and prevents diluted flavour
- citrus salt (lemon or preserved lemon): after draining, cuts through the soft sweetness and brings the flavour back into focus
👨🏼🍳 Chef tip
Don’t overcook. Once the pieces are fully soft, they start to lose definition and break down. At that point, even well-balanced seasoning won’t bring the texture back.
How to Use Finishing Salt on Beets
Beets taste unlike anything else in the kitchen. They are naturally sweet, but grounded by a deep, earthy flavour. Raw, that earthiness is more pronounced and slightly mineral, giving the beet a distinctive, almost soil-like character.
Cook them and that edge softens. The sweetness becomes fuller, the earthiness rounds out, and the texture turns firm but tender, holding its shape as it cooks.
Beets don’t dilute. They concentrate.
Salt keeps that intensity in balance. It lifts the sweetness and keeps the earthiness from becoming too dominant.
Raw Beets
Raw beets are firm, slightly dry on the surface, and intense in flavour.
If you add salt directly, it stays where it lands, or falls off. On thick pieces, it feels sharp and separate. Raw beets need a medium to carry seasoning.
When to add finishing salt on raw beets: Add salt to the dressing first (lemon juice, vinegar, or a light oil), then toss grated or shaved beet. Adjust with a small pinch at the end if needed.
How much salt to use: Light, but controlled.
Best finishing salts for raw beets:
- fine mineral salt: for grated or shaved beet, seasons evenly and sharpens the natural sweetness
- vinegar-based salts (e.g. red wine or apple vinegar salt): for raw beet salads, cuts through earthiness and adds needed acidity
- light spice salts (e.g. coriander seed or mild chilli): for thinly sliced beet, adds edge and prevents the flavour from feeling flat
👨🏼🍳 Chef tip
Grate or shave them. Whole slices stay too dense and the seasoning never reaches the centre. Breaking the structure lets the salt and acid move through the beet.
Roasted Beets
This is where beets become fully developed. Heat concentrates the sugars and softens the texture without breaking it down. The surface dries slightly, sometimes caramelises at the edges, while the inside stays dense and moist.
The flavour becomes deeper, sweeter, and more concentrated.
Salt doesn’t just sit. It settles into the surface and spreads slowly through the beet.
When to add finishing salt on roasted beets: At the end, once the surface is dry and the edges begin to darken.
How much salt to use: Moderate. Beets can carry more salt than most vegetables.
Best finishing salts for roasted beets:
- flaky mineral finishing salt: for roasted beets, adds surface contrast and keeps the flavour clean
- vinegar-based salts (e.g. red wine or balsamic): for warm or dressed beets, cuts through earthiness and balances the sweetness
- black garlic salt: for deeply roasted beets, reinforces sweetness and adds rounded savoury depth
- light smoked salt: for roasted or grilled beets, adds a dry, savoury edge that contrasts the sweetness
👨🏻🍳 Common mistake
Serving beets without contrast. When they’re cooked and sweet, especially roasted, the flavour becomes dense and heavy. Without acid, fat, or enough salt, they taste one-dimensional.
Boiled and Steamed Beets
Beets soften in water but keep their structure. They absorb seasoning gradually, creating an even flavour from edge to centre. The result is smoother, but less defined than roasting.
When to add finishing salt on boiled beets: Salt the water during cooking. Taste after draining, then adjust with a light pinch if needed.
How much salt to use: Moderate in the water, light finishing.
Best finishing salts for boiled beets:
- mineral salt (in cooking water): seasons the interior and prevents diluted flavour
- vinegar-based salt (e.g. red wine or apple): after draining, cuts through the earthiness and keeps the sweetness in check
👨🏼🍳 Flavour insight
Because the flavour is evenly distributed, boiled beets benefit from contrast added at the end. Acid, fat, or a small amount of finishing salt keeps them from tasting flat.
How to Use Finishing Salt on Parsnips
Parsnips have a sweetness that feels deeper than most vegetables. Less bright than carrot, more grounded, with a nutty, almost spiced note that shows up as you chew.
When cooked well, they become soft and concentrated, with edges that taste rich without needing anything added.
That richness builds quickly.Salt keeps it in check so it stays clear instead of heavy.
Raw Parsnips (Shaved)
Shave them thin and they stay firm with a mild sweetness and a slightly dry bite. They don’t carry much on their own, so keep the seasoning tight.
When to add finishing salt on raw parsnips: Right before serving.
How much salt to use: Very light.
Best finishing salts for raw parsnips:
- fine mineral salt: for shaved or thin slices, seasons evenly and sharpens the mild sweetness
- fennel salt: for shaved parsnip with oil, adds a dry aromatic lift that keeps the flavour from feeling flat
- white pepper salt: for raw preparations, reinforces the natural heat and adds a clean, sharp edge
🧑🏽🍳 Common mistake
Using thick slices. They stay woody and the flavour never opens up. If it resists the knife, it will resist seasoning.
Grilled, Roasted and Pan-Cooked Parsnips
Bite into a well-cooked parsnip and the first thing you get is sweetness, but not light or fresh. It’s dense, almost toasted, with a slight bitterness at the edges that keeps it from tipping into sugar.
That balance is fragile. Leave it alone, and it turns soft and one-note. Push it too far, and the edges go bitter.
Salt is what holds that line.
When to add finishing salt on grilled, roasted and pan-cooked parsnips: After cooking, once colour is established.
How much salt to use: Light to moderate.
Best finishing salts for grilledn, roasted and pan-cooked parsnips:
- flaky mineral salt: for roasted parsnips with caramelised edges, adds surface contrast
- nutmeg salt: for mashed or puréed parsnips, supports the natural sweetness without making it heavy
- light umami salt (e.g. mushroom, used sparingly): for pan-cooked or butter-finished parsnips, adds depth and balances sweetness
👨🏼🍳 Chef tip
Cut uneven sizes on purpose. Smaller pieces caramelise more, larger ones stay soft. That mix gives you contrast—and makes the seasoning more noticeable.
How to Use Finishing Salt on Broccoli
Broccoli is built on contrast. The florets are delicate and intricate, with hundreds of tiny surfaces that catch flavour. The stems are dense, slightly sweet, and almost creamy when cooked properly.
There’s a clear bitterness in broccoli, strongest in the florets. It’s clean, slightly sharp, and you taste it immediately. Underneath that, especially in the stems, there’s a mild sweetness that only really shows once it’s cooked.
That contrast is what makes broccoli work. Salt pulls the sweetness forward and keeps the bitterness in check, so it tastes balanced instead of sharp or flat.
Raw Broccoli
Raw broccoli is tight, dry on the surface, and intensely green.
Salt on its own doesn’t spread across the surface. It sits where it lands unless the structure is broken or something carries it across the surface. Raw broccoli needs dressing.
When to add finishing salt on raw broccoli: Add salt to the dressing first (lemon juice, vinegar, or olive oil), then toss thin slices or small florets. Adjust with a small pinch at the end if needed.
How much salt to use: Light, evenly distributed.
Best finishing salts for raw broccoli:
- fine mineral salt: for thin slices, seasons evenly and sharpens the base flavour
- vinegar-based salts: cuts through [earthy/sweet element] and adds definition
- white pepper or light spice salt: adds edge and prevents the flavour from feeling flat
👨🏼🍳 Chef tip
Slice stems thin and cut florets small. Large pieces stay dry and unevenly seasoned. Smaller cuts hold dressing and salt properly.
Roasted and Grilled Broccoli
This is where broccoli becomes fully expressive. The florets crisp and darken at the edges, developing a nutty depth with slight bitterness. The stems soften and turn sweeter, with a more rounded texture.
For salt to work properly, the surface needs to be no longer wet from steam, but still coated in oil.
Add it too early and it pulls moisture out, slowing browning. Add it at the end and it lands on the hot, glossy surface, dissolves lightly into the oil, and spreads across the florets.
When to add finishing salt on roasted or grilled broccoli: After cooking, once the steam has settled and the surface looks glossy, not wet.
How much salt to use: Moderate. Enough to balance bitterness without masking it.
Best finishing salts for roasted or grilled broccoli:
- mineral finishing salt: for roasted or grilled broccoli, adds surface contrast and keeps the flavour clean
- mushroom salt (used lightly): for roasted broccoli, reinforces savoury depth without masking the vegetable
- black garlic salt: for deeply charred broccoli, adds rounded sweetness and depth
- citrus or vinegar-based salt: for roasted or grilled broccoli, sharpens bitterness and keeps the flavour from feeling heavy
👩🏽🍳 Chef tip
The florets trap salt in their structure. A small pinch goes further than you expect, especially on well-roasted edges.
Steamed and Blanched Broccoli
Steamed broccoli is softer, cleaner, and more uniform. The bitterness is milder, the sweetness more subtle, and the surface stays slightly wet.
Salt dissolves quickly here and integrates fast, but with very little contrast between surface and centre.
When to add finishing salt on steamed broccoli: Salt the water lightly, then do a final seasoning after draining, once excess steam has escaped.
How much salt to use: Moderate in the water, light at the end.
Best finishing salts for steamed broccoli:
- mineral salt (in cooking water): seasons the interior and prevents blandness
- citrus salts (lemon or bergamot): after steaming, sharpens the green flavour and balances bitterness
- light herb salts (dill, parsley): for simply dressed broccoli, adds freshness without masking the vegetable
👨🏼🍳 Flavour insight
Without browning, broccoli needs lift. A small amount of acid with the salt sharpens the flavour and keeps it from feeling flat.
How to Use Finishing Salt on Cauliflower
Cauliflower starts quiet. Mild, slightly sweet, with a faint nuttiness that shows more clearly once it’s cooked.
What makes it interesting is how much it can take on. The florets are dense but porous. They don’t push flavour outward, they absorb it, hold it, and carry it through the whole bite.
Cook it well and the edges turn golden and nutty, while the inside stays soft and almost creamy. Cook it in water and it stays pale, softer, and more neutral.
Salt doesn’t just sit on cauliflower. It gets pulled into it.
Raw Cauliflower
Raw cauliflower is firm, dry on the surface, and slightly crumbly when cut. Bite into it and you get a clean snap, then a faint cabbage-like sharpness.
If you sprinkle salt directly onto it, it doesn’t spread. It clings in small patches or falls off entirely. Each bite tastes uneven. Some parts sharp, others completely unseasoned.
You need something to carry it. Raw cauliflower needs dressing, otherwise the seasoning never spreads and the flavour stays uneven.
When to add finishing salt on raw cauliflower: Add salt to the dressing first (lemon juice, vinegar, or olive oil), then toss shaved or finely sliced cauliflower. Adjust with a small pinch at the end if needed.
How much salt to use: Light, evenly distributed.
Best finishing salts for raw cauliflower:
- fine mineral salt: for shaved or finely chopped cauliflower, seasons evenly and sharpens the mild bitterness
- vinegar-based salts (e.g. apple or white wine): for raw preparations, cuts through the dry, crumbly texture and adds needed acidity
- light spice salts (e.g. cumin or coriander): for raw cauliflower salads, adds warmth and prevents the flavour from feeling flat
👨🏼🍳 Chef tip
Shave or slice thin. Thick raw florets stay dry inside and never season properly. Thin cuts let the salt and acid move through the structure.
Roasted Cauliflower
This is where cauliflower develops depth. High heat dries the surface and creates deep golden edges. The flavour shifts from mild to nutty, slightly sweet, and savoury. The inside softens but keeps structure.
Because the surface is porous, salt doesn’t just sit. It gets pulled in and held. But timing matters. Add salt too early and it draws moisture out, slowing browning. Add it at the end and it lands on a hot, dry surface, dissolves lightly into the oil, and settles into the surface of the florets.
When to add finishing salt on roasted cauliflower: After roasting, once the surface is golden and no longer steaming.
How much salt to use: Moderate to slightly higher. Cauliflower needs it to avoid tasting flat.
Best finishing salts for roasted cauliflower:
- flaky mineral finishing salt: for roasted cauliflower, adds surface contrast and keeps the flavour clean
- mushroom salt (used lightly): reinforces savoury notes without masking the vegetable
- black garlic salt: for deeply roasted cauliflower, adds rounded sweetness and depth
- warm spice salts (e.g. saffron, cumin-forward blends): for spiced or oil-roasted cauliflower, adds warmth and complexity
👩🏼🍳 Common mistake
Under-seasoning. Cauliflower doesn’t have a strong base flavour, so without enough salt it tastes dull even when perfectly cooked.
Steamed and Boiled Cauliflower
Cooked in water, cauliflower softens quickly and absorbs liquid. The texture becomes uniform, the flavour lighter, and the surface stays moist. Salt integrates immediately and evenly, but without contrast.
When to add finishing salt on steamed cauliflower: Salt the water during cooking, then finish lightly after draining once excess steam has escaped.
How much salt to use: Moderate in the water, light at the end.
Best finishing salts for steamed cauliflower:
- fine mineral salt (in water + light finish): baseline seasoning, clean and even
- preserved lemon salt: sharpens the flavour and cuts through the softness
- dill salt: works with moisture, adds freshness without heaviness
- tarragon salt: gives a subtle anise note that adds character to an otherwise flat base
👩🏽🍳 Flavour insight
Without browning, cauliflower needs contrast. A small amount of acid with the salt keeps it from tasting soft and one-dimensional.
How to Use Finishing Salt on Cabbage
Cabbage is all structure at first. Tight layers, crisp bite, and a clean snap when you cut through it. Raw, it’s fresh and slightly sweet, with a faint sulphur edge that lingers in the background.
What makes cabbage interesting is how quickly it changes.
Add salt and it starts to soften almost immediately. The leaves relax, liquid comes out, and the texture shifts from rigid to flexible. Cook it and it goes further. Tender, slightly silky, with a deeper sweetness.
Cabbage doesn’t just cook. It compresses. Salt drives that change. It doesn’t just season the surface, it reshapes the texture and concentrates the flavour at the same time.
Raw Cabbage
Raw cabbage is crisp, layered, and firm, with a dry surface once cut.
If you sprinkle salt directly onto it, it doesn’t spread evenly at first. Then the moisture starts to come out. The surface turns slightly wet, the leaves soften, and the flavour becomes more rounded.
This happens within minutes.
When to add finishing salt on raw cabbage: Just before serving for a clean, crisp bite, or a few minutes earlier if you want it slightly softened.
How much salt to use: Light. It will intensify as moisture is released.
Best finishing salts for raw cabbage:
- fine mineral salt: for shredded cabbage, tightens the fibres and seasons evenly without over-softening
- citrus salts (lemon or yuzu): for raw salads or light dressings, sharpens the flavour and cuts through the dense, fibrous texture
- celery leaf salt: for slaws and raw cabbage dishes, reinforces the green, savoury edge and adds depth without heaviness
👩🏽🍳 Chef tip
Salt one small portion first and wait 2–3 minutes. You’ll see how quickly it softens. Then decide if the rest needs it. It’s easy to overshoot.
Shredded Cabbage / Slaw
This is where cabbage becomes cohesive. Once shredded, salt works faster and more evenly. It pulls water out of the strands, softens the fibres, and brings everything together. The texture shifts from stiff and separate to flexible and slightly glossy.
You’re not just seasoning. You’re controlling texture.
When to add finishing salt on shredded cabbage: 5–15 minutes before serving, then taste and adjust.
How much salt to use: Light to moderate, depending on how much softening you want. The more you add, the softer the cabbage gets.
Best finishing salts for shredded cabbage:
- fine mineral salt: for freshly shredded cabbage, draws out moisture and tightens the texture before dressing
- citrus salts (lemon or yuzu): for lighter slaws, sharpens the flavour and keeps the cabbage from tasting dull once it softens
- celery leaf salt: for classic slaws, reinforces the savoury, green backbone and adds depth without heaviness
🧑🏽🍳 Flavour insight
As cabbage releases water, the flavour concentrates. What starts mild becomes more pronounced, so salt will taste stronger after resting than it does at the start.
Sautéed and Stir-Fried Cabbage
Heat takes cabbage in a different direction. It releases water first, then that moisture cooks off. The leaves soften but keep some bite, and the flavour becomes sweeter and rounder.
Salt still follows moisture. Add it too early and it disappears into the released liquid. Add it once the pan dries out and it settles on the surface and sharpens the final flavour.
When to add finishing salt on cooked cabbage: At the end, once excess moisture has evaporated and the cabbage looks glossy, not wet.
How much salt to use: Moderate.
Best finishing salts for cooked cabbage:
- flaky mineral finishing salt: for cooked cabbage, adds surface contrast and keeps the flavour clean
- light mushroom salt (used sparingly): adds savoury depth without masking the cabbage
- mild garlic salt: for sautéed or butter-finished cabbage, reinforces sweetness and aroma
- citrus or vinegar-based salt: for simply cooked cabbage, sharpens the flavour and keeps it from feeling flat
👨🏼🍳 Common mistake
Salting early and crowding the pan. The cabbage steams in its own liquid, turns soft, and never develops flavour. The salt disappears into the water instead of shaping the dish.
How to Use Finishing Salt on Kale
Kale doesn’t meet you halfway. Tear a leaf and you feel the resistance immediately. Thick, fibrous, slightly dry. The flavour is dark green with a clear, lingering bitterness.
What makes kale worth using is what happens when you handle it properly. Work it and it softens. The fibres loosen, the colour deepens, and the flavour becomes more rounded and integrated. Unlike cabbage, which collapses quickly once salted, kale holds its structure longer. You have to actively break it down.
Salt plays two roles here. It seasons, but it also helps physically change the leaf.
Raw Kale (Untreated)
Raw kale is firm, dry, and resistant. If you sprinkle salt over it and serve, it stays exactly that: tough, unevenly seasoned, and sharp.
The salt doesn’t move. It sits on the surface while the leaf stays intact. Dry seasoning doesn’t work here.
When to add finishing salt on raw kale: Don’t. Either leave it completely unseasoned or use a dressing to carry the salt.
How much salt to use: If using a dressing, light and evenly distributed.
Best finishing salts for raw kale:
- fine mineral salt: helps soften the fibres and seasons evenly
- citrus salts (lemon or yuzu): for dressed kale, cuts through bitterness and keeps the flavour sharp
- nut-based salts (e.g. sesame): for raw kale salads, adds texture and balances the bitterness
👨🏼🍳 Chef tip
If you’re serving kale raw without massaging, don’t try to force seasoning onto it. Either keep it clean and sharp, or use a dressing so the salt can spread. Dry salt on raw kale almost always tastes uneven.
Massaged Kale
This is where kale changes direction. Add salt, then work it with your hands. Within a minute or two, the leaves start to collapse. They darken, soften, and lose their dry, fibrous feel.
You’re not just seasoning. You’re actively reshaping the leaf.
Raw kale can be served as-is if you want a firm, bitter, structured bite. Massaging takes it somewhere else. Softer, more cohesive, easier to eat in larger amounts.
When to add finishing salt on massaged kale: At the start, as part of massaging (1–3 minutes), then adjust at the end.
How much salt to use: Light to moderate. Enough to break down the leaf without making it heavy.
Best finishing salt for massaged kale:
- fine mineral salt: for massaging, breaks down the fibres and softens the leaves
- citrus salt (lemon or yuzu): after massaging, sharpens the flavour and balances the bitterness
- nut-based salt (e.g. sesame): after dressing, adds texture and rounds out the bitterness
🧑🏻🍳 Food science insight
As the fibres break down, the salt moves through the leaf instead of sitting on top. The bitterness softens, and the flavour becomes more integrated and rounded.
Sautéed and Wilted Kale
Heat softens kale, but it keeps more structure than spinach. You still get bite. Water releases first, then cooks off. If you salt while the pan is still wet, it disappears into that liquid.
When to add finishing salt on sautéed kale: Once most of the moisture has evaporated and the leaves look glossy, not wet.
How much salt to use: Moderate.
Best finishing salts for sautéed kale:
- flaky mineral finishing salt: for sautéed kale, adds surface contrast and keeps the flavour clean
- light mushroom salt (used sparingly): adds depth without masking the green bitterness
- light garlic salt: for oil- or garlic-cooked kale, reinforces aroma and rounds the flavour
- citrus salt (lemon): for simply sautéed kale, sharpens the bitterness and keeps the dish from feeling heavy
👨🏼🍳 Chef tip
Add a small amount of fat early, but hold back a little for the end. Kale absorbs oil as it cooks. A final touch of oil before finishing salt gives the surface something to carry the seasoning, instead of letting it disappear into the leaves.
Kale Chips
Here, kale goes in the opposite direction. Instead of softening, it dries out completely. Thin, crisp, brittle.
Now salt behaves differently. There’s no moisture to absorb it. Everything happens on the surface.
When to add finishing salt on kale chips: Salt kale chips in two passes. Add a very light pinch right after baking while they’re still warm, toss, then add a second small pinch if needed. This spreads the salt more evenly than trying to hit it in one go.
How much salt to use: Light, evenly distributed.
Best finishing salts for kale chips:
- fine mineral salt: for clean, even seasoning on crisp leaves
- light smoked salt: for baked chips, reinforces the toasted flavour
- lemon salt or other citrus salts: adds sharp contrast against dryness and bitterness
- chilli salt (very light): adds heat and edge, keeping the flavour from feeling flat
👨🏻🍳 Flavour insight
With no moisture, the salt stays on the surface. Every bite hits directly, so uneven seasoning shows immediately.
How to Use Finishing Salt on Brussels Sprouts
Brussels sprouts reward aggressive cooking. Cut one open and you see the structure immediately: tight core, layered leaves wrapped around it. That difference matters.
Raw, they’re dense and sharply vegetal. Cook them hard and the outer leaves blister and crisp, while the centre softens and turns slightly sweet. Done right, you get both in one bite.
They don’t collapse like softer vegetables. They hold their shape, then they colour. Salt is what brings those two parts together. It sharpens the crisp edges and pulls the sweetness out of the core.
Raw Brussels Sprouts
Raw sprouts are firm, slightly dry, and carry a direct, bitter edge. If you leave them whole or cut too large, salt stays where it lands and the flavour feels uneven.
They need to be shaved or sliced thin to take seasoning evenly.
When to add finishing salt on raw Brussels sprouts: After shaving, just before serving or lightly worked in.
How much salt to use: Light.
Best finishing salts for raw Brussels sprouts:
- fine mineral salt: for shaved sprouts, seasons evenly and starts to soften the tight layers
- mustard seed salt: for raw salads, sharpens bitterness and adds a pungent edge that cuts through density
- citrus salts (preserved lemon): for dressed sprouts, adds lift and keeps the flavour from turning heavy
👨🏼🍳 Chef tip
Shave them fine and dress them lightly before salting. A small amount of acid or oil gives the salt something to move across. Without that, it stays patchy.
Roasted and Pan-Seared Brussels Sprouts
Cut-side down in a hot pan, the sprouts start by sitting still. Then the edges begin to darken. The outer leaves loosen, curl, and crisp at the tips, turning almost chip-like. The centre holds longer – dense, pale, slowly softening.
That split is what you’re cooking for. Crisp, bitter edges against a sweeter, tighter core.
Salt has to land after that contrast forms. Add it too early and the cut surface releases moisture before it can brown. The pan turns wet, the leaves soften instead of crisping, and the edges never develop.
When to add finishing salt on roasted Brussels sprouts: At the end, once the leaves are crisp and the cut sides are deeply browned.
How much salt to use: Moderate to slightly higher. The density of the core needs it.
Best finishing salts for roasted Brussels sprouts:
- flaky mineral finishing salt: for roasted sprouts, adds surface contrast and keeps the flavour clean
- mushroom salt (used lightly): reinforces roasted depth without masking the vegetable
- black garlic salt: for deeply browned sprouts, adds sweetness to balance bitterness
- vinegar-based salt (e.g. apple or malt): for roasted sprouts, sharpens bitterness and keeps the flavour from turning heavy
- peanut or satay-style salt blends: for oil-rich or Asian-style roasted sprouts, adds richness and a nutty contrast
🧑🏼🍳 Flavour insight
The leaves and core season differently. Crisp leaves hold salt on the surface, giving sharp, immediate hits. The core absorbs it more slowly, which is what brings out the sweetness. Good seasoning makes that contrast clear instead of muddled.
Boiled and Steamed Brussels Sprouts
Cooked in water, Brussels sprouts soften evenly from edge to centre. The leaves and core move closer together in texture, and the flavour stays cleaner and more direct.
Because there’s no browning, nothing builds on the surface. Everything happens inside the sprout.
Salt behaves differently here. It doesn’t sit or contrast. It spreads through the entire piece.
When to add finishing salt on boiled and steamed Brussels sprouts: Salt the water during cooking, then finish lightly after draining, once excess steam has escaped.
How much salt to use: Moderate in the water, minimal at the end.
Best finishing salts for boiled and steamed Brussels sprouts:
- fine mineral salt (in cooking water): seasons the interior and prevents blandness
- citrus salt (lemon): after cooking, cuts through the cabbage note and brings the flavour into focus
- light herb salts (dill): for simply dressed sprouts, adds freshness and keeps the flavour from feeling heavy
🧑🏾🍳 Chef tip
Let them sit uncovered for 30–60 seconds after draining. If the surface is still wet, the finishing salt dissolves immediately and disappears. A slightly drier surface gives you cleaner, more controlled seasoning.
How to Use Finishing Salt on Lettuce
Lettuce is at its best when it’s cold, crisp, and intact. Tear a leaf and you hear it.. Bite it and it snaps, then floods your mouth with water.
That water is the whole game. Salt it too early and the leaves start to leak. They soften, collapse, and lose the clean bite that makes lettuce worth eating in the first place.
You’re not building heavy flavour here. You’re protecting structure while sharpening it.
Raw Lettuce (Salads and Whole Leaves)
Fresh lettuce is hydrated and delicate. The surface looks dry, but it’s holding a lot of water just underneath. As soon as salt touches it, that water starts to come out.
If you salt too early, the leaves turn glossy, then limp. The flavour dilutes and the texture goes flat. Salt has to land late and lightly. Season the dressing first, then finish with a small pinch after tossing. This gives you both even coverage and a slight surface hit, instead of over-salting one or the other.
When to add finishing salt on raw lettuce: Salt the dressing first, then add a small pinch after tossing, just before serving.
How much salt to use: Very light. Often less than you think.
Best finishing salts for raw lettuce:
- fine mineral salt: clean, even seasoning that doesn’t weigh down delicate leaves
- preserved lemon salt: adds brightness without introducing extra liquid
- green herb salt (parsley, chive): for simple salads with oil, adds freshness without masking the leaf
- celery seed salt: reinforces the green profile and adds a subtle savoury edge
🧑🏽🍳 Common mistake
Salting before tossing. The first leaves get hit, release water, and the rest stay under-seasoned. You end up with both soggy and bland in the same bowl.
Grilled or Lightly Wilted Lettuce (Romaine, Little Gem)
Heat changes lettuce fast. The outer leaves soften and pick up char, while the core stays crisp. You get contrast, but only if you keep control. Salt too early and moisture comes out before the heat does its job. The leaves steam instead of charring. After cooking, the surface is warm and slightly dry. This is where salt works.
When to add finishing salt on grilled or wilted lettuce: Immediately after cooking, while still warm.
How much salt to use: Light to moderate, depending on char.
Best finishing salts for grilled or wilted lettuce:
- mineral finishing salt: for clean definition
- smoked salt: works with char, especially grilled romaine
- anchovy salt or olive salt: adds depth without overpowering the leaf
👨🏼🍳 Chef tip
Cut romaine or little gem in halves or quarters and cook cut-side down without moving it. Let it colour properly, then turn once. Finish with salt off the heat so it stays on the surface instead of dissolving.
🧑🏻🍳 Flavour insight
The outer leaves catch salt and give immediate flavour. The core stays fresher and slightly sweet. Proper seasoning keeps that contrast clear instead of blending it into one soft texture.
How to Use Finishing Salt on Cucumber
Cucumber is built on water and tension. Thin skin, crisp flesh, and a clean snap that holds only as long as you leave it alone. Bite it and it floods your mouth. Cold, crisp, and full of water.
The moment salt hits it, the surface starts to wet out and the snap starts to soften. Give it a minute and you’ll see liquid pooling. Leave it longer and the slices soften, lose their edge, and start tasting diluted instead of fresh.
Everything with cucumber happens fast. You’re working in minutes, not stages. A light, late seasoning keeps the snap. A short rest changes the texture completely.
When to add finishing salt on cucumber: For crisp texture, salt right before serving. For a light cure, salt 3–10 minutes ahead, then taste and adjust.
How much salt to use: Very light at first. You can always add more once water starts to release.
Best finishing salts for cucumber:
- fine mineral salt: even, fast coverage
- lemon salt: sharpens without adding more liquid
- rice vinegar salt or yuzu salt: fits the clean, high-water profile
- light chilli salt: works well once the cucumber is lightly cured
👨🏼🍳 Chef tip
If you want control, salt and let it sit for 5 minutes, then drain off the released liquid before serving. This keeps the flavour concentrated without turning the texture soft and watery.
How to Use Finishing Salt on Radish
Cut into a radish and it snaps clean. The flesh is tight and crisp, with a dry surface and a sharp, peppery bite that hits first, then fades into a mild sweetness.
That bite is the point.
Radish doesn’t soften or release water the way cucumber or cabbage does. It stays firm. Salt doesn’t move on its own here. It sits where you put it unless the cut gives it somewhere to go.
Radish needs to be sliced thin to season properly. If you cut radish too thick, the salt only coats the outside. You bite through a salty edge into a sharp, unseasoned centre. If you slice it thin or shave it, the salt spreads across the whole piece. The heat softens slightly and the flavour becomes more even from edge to centre.
If you leave it for a few minutes, the sharpness settles without losing the crunch.
When to add finishing salt on radish: Slice first, then salt just before serving. For a softer, more rounded bite, salt 5–10 minutes ahead and taste before serving.
How much salt to use: Light to moderate. Enough to balance the sharpness without covering it.
Best finishing salts for radish:
- mineral finishing salt: clean, direct contrast to the crunch
- preserved lemon salt: sharpens and lifts the flavour
- butter salt or cultured butter salt: works especially well with sliced radish on bread
- black garlic salt: adds depth to the sharp bite without muting it
🧑🏾🍳 Chef tip
Salt one slice and taste it before seasoning the rest. Radish varies a lot in sharpness. Some are mild, others aggressive. Adjust from there instead of seasoning the whole batch blindly.
How to Use Finishing Salt on Asparagus
Asparagus changes with colour and cooking method.
Green asparagus usually needs snap and brightness. Salt the water when boiling or blanching, then finish at the end if the spears taste flat. For roasted or grilled green asparagus, salt lightly before roasting, then taste again while it is still hot.
White asparagus needs a different approach. It is thicker, milder, and usually cooked until tender, so the cooking water matters more. Season the water first, then finish lightly with mineral salt or saffron salt at the end.
Best finishing salts for asparagus: artisan mineral salt for clarity, preserved lemon salt for green asparagus and brightness, saffron salt for white asparagus or butter-based dishes, and black garlic salt for roasted asparagus with deeper savoury foods.
Salt Rule: salt the water for boiled asparagus. Finish after cooking for brightness, texture, or lift.
👨🏼🍳 Read the full guide: How to Salt Asparagus
How to Use Finishing Salt on Celery
Celery snaps loud when it’s fresh. You cut through it and feel the fibres pull slightly before it breaks. Bite it and it releases water, followed by an immediate savoury, slightly salty taste with a green, herbal edge.
It already tastes seasoned.
That’s why salt needs restraint. Too much and it turns harsh. Too early and it dulls the freshness.
Raw Celery
Raw celery is crisp, fibrous, and aromatic. The surface looks dry, but once cut, it releases just enough moisture for salt to spread quickly.
How you cut it matters. Thick sticks keep their structure when seasoned, but the fibres stay tight. Salt sits more on the surface. Slice it thinner or on an angle, and the fibres open up. The salt spreads more evenly and the flavour feels less aggressive.
When to add finishing salt on raw celery: Right before serving, after cutting.
How much salt to use: Very light. Celery already carries salinity.
Best finishing salts for raw celery:
- fine mineral salt: clean, minimal interference
- preserved lemon salt: lifts and sharpens the herbal note
- celery leaf salt: intensifies its own flavour without adding weight
- light chilli salt: works well with the crunch and water content
🧑🏽🍳 Food science insight
Celery contains natural sodium and aromatic compounds (like phthalides) that give it a savoury, almost salty perception. That’s why it needs less added salt than most vegetables.
Cooked Celery (Sautéed and Braised)
Heat softens the fibres of celery and removes the raw edge. The flavour becomes rounder, slightly sweet, and more subtle. The structure relaxes, but it still holds shape.
If you salt it early, the salt dissolves into the released moisture and disappears. By the time the pan dries, the celery can taste under-seasoned.
When to add finishing salt on cooked celery: At the end, once most moisture has cooked off and the surface looks lightly glossy.
How much salt to use: Light to moderate, depending on how much the flavour has mellowed.
Best finishing salts for cooked celery:
- mineral finishing salt: lifts the clean note of celery
- butter salt: works with the softened sweetness
- mushroom salt: adds depth without overpowering
- white miso salt: pairs well with braised celery
🧑🏻🍳 Flavour insight
As celery cooks, its natural salinity becomes less obvious and the sweetness comes forward. Finishing salt restores balance and keeps the flavour defined instead of muted.
How to Use Finishing Salt on Endives
Endive has a clean, appetising bitterness that makes rich food taste sharper and lighter. Paired with fat (blue cheese, walnut, butter) it cuts through and resets the palate instead of adding weight.
The leaves stay tight and crisp, with just enough sweetness underneath to keep the bitterness in check. That balance is fragile.
Salt doesn’t remove that bitterness. It controls how it comes through. Clean and precise, or heavy and lingering.
Raw Endives
Raw endive is crisp, structured, and direct. The bitterness sits right at the front, and the surface stays relatively dry, so salt doesn’t travel far.
The cut matters. The base of the endive is always more bitter. If you leave it intact, that intensity stays concentrated in one part of the leaf. Slice through it or trim it lightly so the flavour distributes more evenly.
If you over-season, the bitterness turns harsh quickly. If you under-season, it feels disconnected and flat.
When to add finishing salt on raw endives: Right before serving, once cut and arranged.
How much salt to use: Very light.
Best finishing salts for raw endives:
- fine mineral salt: clean control over bitterness
- lemon zest salt: sharpens and lifts the leaf
- celery seed salt: reinforces the bitter-green profile
- flaky mineral salt (with crushed walnuts): for classic endive salads, adds texture and a slight fat contrast
👨🏼🍳 Chef tip
Taste a leaf from the tip and one from the base before seasoning. Adjust from there instead of seasoning everything the same.
Cooked Endives (Pan, Braised, or Grilled)
Heat changes endive quickly. The leaves soften, the edges take on colour, and the bitterness pulls back. In its place, you get a rounder flavour with more noticeable sweetness.
But the structure isn’t even. The base stays denser and more bitter than the tips. If you season everything the same, the base tastes harsh while the rest feels flat.
Season the cut side and the base slightly more than the outer leaves. That’s where the bitterness sits.
Salt behaves differently here. The surface is warmer, slightly softer, and carries fat more easily. It spreads faster, but it can also flatten the flavour if you add too much.
When to add finishing salt on cooked endives: At the end, once the surface is dry and no longer steaming.
How much salt to use: Light to moderate.
Best finishing salts for cooked endives:
- mineral finishing salt: adds a clean salt hit without masking the bitterness or sweetness
- brown butter salt: works with the developed sweetness
- miso salt (or (or a light miso glaze, then finish with salt): adds depth without masking bitterness
👩🏽🍳 Flavour insight
Cooking reduces the sharpness of bitterness. Finishing salt brings back structure, so the dish doesn’t drift into soft, sweet heaviness.
How to Use Finishing Salt on Green Beans
A good green bean snaps clean, then releases a fresh, slightly sweet flavour that stays tight and focused. It doesn’t melt or spread, it holds.
That structure is the point.
Salt sits on it, not in it. If the texture is right, seasoning becomes part of the bite. If it’s not, no amount of salt will fix it.
Raw Green Beans
Raw beans are firm and slightly resistant. Slice them thin or keep them whole, but don’t expect them to soften.
This is about sharp, clean flavour.
When to add finishing salt on raw green beans: Right before serving.
How much salt to use: Light.
Best finishing salts for raw green beans:
- fine mineral salt: for simple raw salads
- celery salt: reinforces the green, savoury note
- cracked black pepper salt: adds edge to thinly sliced beans
🧑🏽🍳 Common mistake
Trying to “season them into tenderness.” Raw beans stay firm. If you want them softer, cook them, don’t over-salt them.
Cooked and Blanched Green Beans
Cooked just enough to keep their snap, but lose the raw edge. This is the cleanest version.
Dry them properly, this is where control starts.
When to add finishing salt on cooked or blanched green beans: After blanching and drying, just before serving.
How much salt to use: Light to moderate.
Best finishing salts for blanched green beans:
- flaky mineral salt: gives texture against the snap
- preserved lemon salt: works with vinaigrettes or butter
- shallot salt: fits classic French-style preparations
👨🏼🍳 Chef tip
After blanching, spread them out instead of piling them up. Trapped steam softens them further and dulls the texture you just built.
Roasted or Pan-Cooked Green Beans
High heat tightens the skin slightly and adds light browning. The inside stays firm, but the outside develops flavour.
Now salt becomes more visible.
When to add finishing salt on green beans: After cooking, once they’ve taken on colour.
How much salt to use: Moderate.
Best finishing salts for roasted or pan-cooked green beans:
- flaky mineral salt: sits on the surface and adds contrast
- smoked salt: works with blistered skins
- garlic salt: fits pan-cooked beans with oil
👨🏾🍳 Food science insight
Green beans contain relatively little starch, so they don’t absorb seasoning deeply. Most of what you taste sits on the surface, which is why texture and timing matter more than quantity.
How to Use Finishing Salt on Corn
Corn is packed with sugar and water. Each kernel holds pressure. Bite through it and it bursts, releasing a sweet, milky juice.
Salt doesn’t need to build flavour here. It sharpens that sweetness and defines the texture.
Heat changes the texture. The kernels soften, the sugars come forward, and on a grill or in a hot pan the surface starts to dry and take on colour. That surface is where salt actually sticks and becomes noticeable.
Raw Corn (Off the Cob)
Cut straight from the cob, raw corn is crisp, slightly firm, and very sweet. The kernels release juice as you bite, but the surface stays relatively dry.
Salt needs to be fine so it spreads across the kernels instead of clumping.
When to add finishing salt on raw corn: Right before serving, after cutting.
How much salt to use: Very light.
Best finishing salts for raw corn:
- fine mineral salt: even coverage across kernels
- lime salt: sharp contrast to sweetness
- chilli-lime salt: works with the raw crunch and juice
🧑🏽🍳 Common mistake
Salting too early. The cut kernels start releasing liquid, and the bottom of the bowl turns watery while the top stays under-seasoned. Toss and serve immediately.
Boiled Corn
Boiled corn comes out hot, soft, and wet. The surface is slick, so salt dissolves quickly and spreads unevenly if there’s still water clinging to it.
A thin layer of fat helps. It coats the kernels so the salt sticks instead of sliding or disappearing into moisture. You don’t need fat, but it helps.
When to add finishing salt on boiled corn: After cooking, once excess water has drained off. Add fat first if using, then salt.
How much salt to use: Light.
Best finishing salts for boiled corn:
- fine mineral salt: for hot, plain corn, melts into the surface and amplifies natural sweetness
- flaky mineral salt: for buttered corn, adds contrast and texture on top of the fat
- lime or lemon salt: cuts through sweetness and keeps the flavour sharp, especially with butter
- chili salt: for corn with butter or oil, adds heat and contrast without overpowering
👨🏼🍳 Chef tip
Salt one side, rotate, then salt again instead of trying to hit the whole cob at once. This gives you more even coverage and avoids over-salting one section while missing another.
Grilled or Roasted Corn
Grilled or roasted corn is a different ingredient. The surface dries out, the kernels tighten slightly, and you get light charring. Now salt can sit on the surface instead of disappearing.
When to add finishing salt on grilled or roasted corn: Immediately after grilling or roasting, while still hot.
How much salt to use: Light to moderate.
Best finishing salts for grilled or roasted corn:
- flaky mineral salt: sits on the surface, gives clear bursts
- smoked salt: reinforces the char
- chilli salt: especially on grilled corn, where the heat and char need contrast
👩🏾🍳 Chef tip
Leave the corn undisturbed long enough to get real colour before turning. You want dry, slightly blistered patches. That’s where the salt will hold. Season off the heat so it stays on the surface.
How to Use Finishing Salt on Peas
Sweet, green, and gone in one bite. Peas don’t build flavour, they release it. Each one holds sweetness and water inside a thin skin. Bite them and they pop, releasing juice and flavour all at once.
Salt doesn’t sit on peas for long. It dissolves quickly and spreads across many small surfaces at once. If you overdo it, the sweetness disappears fast.
Raw Peas
Fresh peas are firm, sweet, and slightly starchy. Once shelled, they carry a light surface moisture, so salt dissolves quickly and spreads instead of staying where it lands.
When to add finishing salt on raw peas: Right before serving.
How much salt to use: Very light.
Best finishing salts for raw peas:
- fine mineral salt: spreads evenly across the peas
- mint salt: natural pairing, reinforces freshness
- light fennel salt: echoes the green sweetness without heaviness
👨🏾🍳 Common mistake
Salting and letting them sit. The salt dissolves completely and the peas lose definition – everything tastes flat instead of bright.
Cooked Peas (Blanched, Buttered, or Lightly Sautéed)
Heat softens the peas slightly and brings the sweetness forward. The surface stays moist, but if you add butter or oil, it changes how salt behaves.
Without fat, salt dissolves straight into the moisture.
With fat, it spreads more slowly and coats each pea.
That’s the difference between flat and rounded seasoning. A little bit of fat, like olive oil or butter, improves the dish.
When to add finishing salt on cooked peas: After cooking, once drained or coated with fat. If blanching, shake the peas dry in the pan for a few seconds before salting. Removing excess water gives you more control and prevents the salt from disappearing immediately.
How much salt to use: Light to moderate, depending on fat.
Best finishing salts for cooked peas:
- fine mineral salt: keeps the sweetness clear and the flavour precise
- mint salt: for buttered or lightly dressed peas, reinforces freshness without masking
- pea shoot or green herb salt: doubles down on the green profile instead of adding weight
- light aged cheese salt (parmesan-based): adds savoury depth while keeping the peas intact
👨🏼🍳 Food science insight
Because peas are small, salt distributes across many pieces at once. Even slight over-salting affects every bite, which is why restraint matters more here than with larger vegetables.
How to Use Finishing Salt on Garlic
Garlic changes completely depending on how you treat it. Raw, it’s sharp and immediate. Cook it slowly and it turns soft and sweet. Push it further and it becomes deep, nutty, and right on the edge of bitter.
Salt either sharpens that bite or brings structure back once it softens.
Raw Garlic (Crushed or Minced)
Crush garlic and it hits hard. The flavour builds as it sits.
Salt it early, and the heat builds and lingers through the whole dish. Salt it later, and the flavour hits fast and fades quicker, staying more distinct instead of blending in.
When to add finishing salt on raw garlic: Immediately after crushing if you want it worked into a dressing or paste. Right before serving if you want the bite to stay sharp.
How much salt to use: Very light. Garlic escalates quickly.
Best finishing salts for raw garlic:
- fine mineral salt: for dressings and emulsified sauces, softens the sharp edge while keeping the flavour clean
- chilli salt: for garlic rubbed onto bread or stirred into yoghurt, adds heat and balances intensity
- smoked salt: for tomato-based salads or raw salsas with acid, adds depth without overpowering
- herb salt (parsley or oregano): for raw garlic with oil, rounds out the flavour and keeps it from feeling harsh
🧑🏽🍳 Common mistake
Letting crushed garlic sit too long before using it. The flavour keeps building and turns harsh. Use it straight away or balance it with fat or acid.
Roasted Garlic (Whole or Halved Bulb)
Roasted garlic spreads like butter. The sharpness is gone. What’s left is soft, sweet, and slightly caramelised.
Now the issue isn’t intensity, it’s lack of contrast. Without salt, it tastes flat and overly sweet.
When to add finishing salt on roasted garlic: After roasting, while still warm.
How much salt to use: Light to moderate.
Best finishing salts for roasted garlic:
- flaky mineral salt: on warm cloves or spread on bread, adds contrast and structure
- anchovy salt: on toast or with roasted vegetables, adds sharp savoury depth
- herb salt (thyme or rosemary): for roasted garlic with oil or bread, lifts the sweetness and keeps it from feeling heavy
- light chili salt: for roasted garlic spreads or dips, adds edge without overpowering
👨🏼🍳 Chef tip
Squeeze the cloves out while still warm, then season. Once they cool, the surface firms up and the salt won’t integrate as cleanly.
Fried or Crisp Garlic (Optional)
Thin slices cooked until golden and crisp. This is about timing. You’re aiming for golden and crisp – seconds later, it turns bitter.
When to add finishing salt on fried garlic: Immediately after frying, off the heat.
How much salt to use: Light to moderate.
Best finishing salts for fried garlic:
- fine mineral salt: for even coverage on small pieces
- black garlic salt: when you use the fried garlic as a topping for rice, noodles, or greens
🧑🏾🍳 Food science insight
The sharp compounds in raw garlic break down with heat, while browning creates new, deeper flavours. That’s why cooked garlic tastes rounder even before adding fat.
How to Use Finishing Salt on Onions (& Shallots)
Onions start sharp and end sweet. Raw, they are crisp, wet, and pungent. The smell hits immediately, and the flavour follows just as fast. Strong, biting, and hard to ignore.
Give them time or heat and they change completely. The sharpness fades, the sugars come forward, and the texture softens. Cook them long enough and they turn deep, rich, almost jam-like.
Few vegetables move this far.
Salt follows that change. It draws out moisture at the start, softens the bite, and later defines the sweetness so it doesn’t become heavy.
Raw Onions
Raw onions are crisp, wet, and intense.
Salt dissolves immediately on the cut surface and starts pulling out moisture. Used lightly, it softens the bite. Given a few minutes, it changes the onion more noticeably – drawing out liquid, loosening the structure, and rounding the flavour.
The difference is timing.
Season just before serving and the onion stays sharp and crisp. Let it sit for 5–15 minutes and it becomes softer, more balanced, and easier to eat.
When to add finishing salt on raw onions: Just before serving for a sharper bite, or 5–15 minutes earlier to soften and mellow the flavour.
How much salt to use: Light for immediate use. Moderate if curing briefly, then adjust.
Best finishing salts for raw onions:
- fine mineral salt: lightly draws out harshness and brings the natural sweetness forward
- citrus salt (lemon): sharpens and cleans up the sulphurous note
- vinegar salt (apple or red wine): for sliced onions in salads, softens the bite and adds structure
- sumac salt: for raw onion with oil or herbs, adds acidity without extra liquid
👩🏾🍳 Chef tip
Rinse or soak raw onions briefly, then drain before seasoning. It reduces the harsh edge while keeping the onion crisp. Salt works more cleanly after that.
Sautéed Onions
Heat changes onions in stages. First, they release water. Then they soften. As the moisture cooks off, sweetness develops and the texture becomes silky.
Salt works in two phases. Early on, it dissolves into the released liquid and seasons the base. At the end, it sits briefly on the surface and sharpens the final flavour.
When to add finishing salt on sautéed onions: Light seasoning early, then finish at the end once the moisture has reduced.
How much salt to use: Moderate overall, split between cooking and finishing.
Best finishing salts for sautéed onions:
- mineral finishing salt: adds structure and keeps the sweetness clear
- light umami salts (mushroom): for deeper, browned onions, reinforces savoury notes without overpowering
- thyme or rosemary salt: for oil- or butter-cooked onions, lifts the sweetness and adds definition
- vinegar-based salt (sherry or red wine): for slow-cooked onions, cuts through sweetness and keeps the flavour sharp
👨🏼🍳 Chef tip
Don’t rush the water stage. Let the moisture cook off fully before finishing. If the pan is still wet, the final salt disappears into the liquid.
Caramelised Onions
This is where onions fully transform. Long, slow cooking breaks down structure and concentrates sugars. The onions darken, soften completely, and develop a deep, rich sweetness with savoury depth.
Salt needs control across the whole process. A small amount early can help draw out moisture and start the breakdown, but too much at this stage keeps the onions wet and slows proper browning.
As the onions reduce and darken, salt becomes more precise. Added at the end, it sharpens the flavour and keeps the sweetness from becoming heavy or blurred.
When to add finishing salt on caramelised onions: A light pinch early if needed, then adjust at the end once fully reduced and darkened.
How much salt to use: Moderate, carefully adjusted.
Best finishing salts for caramelised onions:
- flaky mineral salt: adds structure and keeps the sweetness from blurring
- black garlic salt: for deeply caramelised onions, reinforces savoury sweetness
- light smoked salt: for darker batches, supports roasted notes
- vinegar-based salt (sherry or balsamic): cuts through sweetness and brings the flavour back into focus
👨🏻🍳 Common mistake
Turning up the heat to speed things up. Onions burn before they caramelise properly. You get bitterness instead of sweetness, and no amount of salt can fix it.
How to Use Finishing Salt on Leeks
Leeks reward patience. Cook them long enough and they turn silky, almost spreadable, with a sweetness that sits low and steady. Rush them, and they stay stringy and sharp.
Salt sets the boundary between those two outcomes.
Raw Leeks (Very Thin)
Slice them fine enough and they lose their bite. Anything thicker fights back.
Give the slices a few minutes on the board. The harsh edge fades slightly, and the texture relaxes.
When to add finishing salt on raw leeks: After slicing and resting briefly, just before serving.
How much salt to use: Very light.
Best finishing salts for raw leeks:
- fine mineral salt: keeps it clean and controlled in vinaigrettes
- apple cider salt: works in sharp, oil-based dressings
- mustard seed salt: good in raw leek salads with fat (cream, mayo, egg)
👨🏼🍳 Chef tip
After rinsing, spin or towel-dry thoroughly. Water left in the layers dilutes the dressing and throws off your salt level.
Pan-Cooked Leeks
Cooked slowly in fat, leeks collapse into a soft, uniform layer. No edges, no contrast—just a smooth base.
Salt has to reintroduce shape.
When to add finishing salt on pan-cooked leeks: At the end, once fully soft and no liquid is pooling.
How much salt to use: Light to moderate.
Best finishing salts for pan-cooked leeks:
- fine mineral salt: integrates cleanly without texture
- brown butter salt: deepens the sweetness in butter-based cooking
- anchovy salt: sharpens savoury dishes (especially with cream, pasta, eggs)
👩🏽🍳 Chef tip
Stop stirring for the last minute. Let parts of the leek catch lightly on the pan. That contrast is where the seasoning becomes noticeable.
Roasted or Grilled Leeks
Here you get contrast back. The outside takes on colour, the inside stays soft.
Now salt has something to land on.
When to add finishing salt on roasted or grilled leeks: Immediately after cooking, while still hot.
How much salt to use: Light to moderate.
Best finishing salts for roasted or grilled leeks:
- flaky mineral salt: sits on the surface, adds texture and contrast
- smoked salt: reinforces char without overpowering
- thyme salt: works with olive oil and roasted flavours
- lemon peel salt: lifts the sweetness and keeps the flavour from turning heavy
👨🏼🍳 Chef tip
Place them cut-side down and leave them. If you move them too early, you lose the surface that carries the seasoning.
Boiled Leeks
Boiled leeks are soft all the way through, but still hold their shape. They absorb whatever they’re paired with, usually vinaigrette, butter, or sauce.
On their own, they can feel washed out. Salt needs to bring them back into focus.
When to add finishing salt on boiled leeks: After draining and dressing, just before serving.
How much salt to use: Light to moderate.
Best finishing salts for boiled leeks:
- fine mineral salt: clean seasoning for vinaigrette
- herb salt (parsley, chive): fits classic cold preparations
- caper salt: adds sharpness and contrast in cold or room temp preparations
🧑🏽🍳 Food science insight
Leeks carry mild sulphur compounds and natural sugars. As they soften, sweetness becomes more noticeable, but the overall flavour stays low-intensity. Small shifts in salt change the entire perception because there’s little else competing
How to Use Finishing Salt on Seaweed (Fresh or Rehydrated)
A good seaweed salad already tastes like the sea. Salty, mineral, slightly sweet, with a soft bite that folds rather than crunches.
If it tastes flat, it’s not missing salt. It’s missing balance.
Squeeze out excess water before dressing. If the seaweed is too wet, the dressing dilutes and you’ll keep chasing flavour with salt instead of fixing the texture.
When to add finishing salt on seaweed: After dressing and tasting, and only if needed.
How much salt to use: Minimal. In many cases, none.
Best finishing salts for seaweed:
- sesame salt (for dressed salads with oil): works because it adds texture and nuttiness
- ginger salt: sharpens cold preparations without adding heaviness
- citrus peel salt (yuzu, orange): lifts richer dressings and cuts through marine depth
🧑🏽🍳 Food science insight
Seaweed is naturally high in glutamates and minerals, which create a built-in savoury taste. Adding salt doesn’t just increase saltiness, it amplifies that depth. A small amount goes a long way, and too much makes everything taste heavy and one-dimensional.
How to Use Finishing Salt on Okra
Done right, okra gives you contrast: lightly crisp edges, a soft centre, and just enough slickness to feel rich without turning heavy. Done wrong, it collapses into one texture.
Salt is what keeps it on the right side.
Raw Okra (Sliced)
Thin slices have a clean bite with a faint stickiness that shows up as soon as you cut.
Keep it simple. This is more about restraint than building flavour.
When to add finishing salt on raw okra: Right before serving.
How much salt to use: Very light.
Best finishing salts for raw okra:
- fine mineral salt: keeps it clean in quick salads and doesn’t amplify the slick texture
- green chilli salt: for raw slices with lime and oil, adds heat and sharpness
- coriander seed salt: fits bright, herb-driven dishes and reinforces the fresh profile
- sumac salt: adds dry acidity that cuts the coating texture without adding liquid
🧑🏽🍳 Common mistake
Cutting too far in advance. The surface turns tacky and clumps together. Slice, season, serve.
Roasted, Grilled or Pan-Cooked Okra
This is the move.
Cook it hard and leave it alone long enough to dry the surface. The edges take colour, the inside stays soft, and the texture becomes controlled instead of sticky.
Salt belongs at the end, once you’ve built that surface.
When to add finishing salt on okra: After cooking, off the heat.
How much salt to use: Light to moderate.
Best finishing salts for high-heat okra:
- flaky mineral salt: lands on the surface and adds contrast
- smoked salt: works with char from grilling or roasting
- garlic salt: fits pan-cooked okra with oil or butter
- lime or amchur salt: adds acidity that cuts through the richness and keeps the flavour sharp
👨🏼🍳 Chef tip
Don’t crowd the pan. If the okra steams, you lose the dry edges and there’s nothing for the salt to sit on. Cook in batches if needed.
Stewed Okra
Here, okra thickens the dish. The texture turns cohesive, almost sauce-like. You’re not chasing crispness anymore. You’re controlling weight.
When to add finishing salt on stewed okra: During cooking, then adjust at the end.
How much salt to use: Moderate.
Best finishing salts for stewed okra:
- fine mineral salt: keeps the base seasoning steady and controlled
- celery salt: works in tomato-based stews and reinforces savoury depth
- paprika salt: fits slow-cooked, spiced dishes and adds warmth
- tamarind or amchur salt: adds acidity that cuts through the thickness and keeps the dish from feeling heavy
👨🍳 Food science insight
Okra contains mucilage, a soluble fibre that thickens when heated. Salt doesn’t remove it, it changes how you perceive it. With enough contrast (acid, heat, or dry surface), it reads as silk instead of slime.
How to Use Finishing Salt on Artichokes
You don’t eat an artichoke in one bite. You work through it – leaf by leaf – dragging each one across your teeth, then finally hitting the heart, soft and dense.
That last bite only works if everything before it was seasoned properly.
Steamed or Boiled Artichokes
Soft leaves, clean flavour, slight bitterness that builds as you go inward. Most of the seasoning doesn’t sit on the artichoke itself, it comes from what you dip it into.
Salt is part of the setup, not just a final sprinkle.
When to add finishing salt on artichokes: On the dip, and lightly over the artichoke just before serving.
How much salt to use: Moderate, spread across both.
Best finishing salts for artichokes:
- fine mineral salt: for butter or olive oil dips
- preserved lemon salt: works with vinaigrettes or aioli
- garlic salt: fits melted butter or mayonnaise-based dips
👨🏼🍳 Chef tip
Season the dip slightly more than you think. Each leaf only carries a small amount, so under-seasoned dips make the whole artichoke taste flat.
Grilled or Roasted Artichokes
Cut in half or quarters, cooked until the edges catch and the inside softens. Now you get contrast: browned tips, tender centres.
This is where salt becomes visible.
When to add finishing salt on grilled or roasted artichokes: Right after cooking, while still hot.
How much salt to use: Light to moderate.
Best finishing salts for grilled or roasted artichokes:
- flaky mineral salt: sits on the edges and adds texture
- smoked salt: works with charred leaves
- rosemary salt: fits roasted artichokes with olive oil
🧑🏽🍳 Common mistake
Seasoning only once. The outer leaves get all the salt, while the inner layers stay bland. Finish lightly, then adjust again after cutting or plating.
How to Use Finishing Salt on Turnips
A good turnip has snap and bite when raw, then turns soft and quietly sweet when cooked. The edge never fully disappears, that’s what keeps it interesting.
Miss the timing and it goes watery and forgettable. Salt keeps it focused.
Raw Turnips (Sliced or Shaved)
Thin slices give you a clean crunch with a mild peppery bite. Not as sharp as radish, but enough to carry seasoning.
Keep it precise.
When to add finishing salt on raw turnips: Right before serving.
How much salt to use: Very light.
Best finishing salts for raw turnips:
- fine mineral salt: clean, even seasoning for salads
- dill salt: works with raw slices, vinegar, and oil
- black pepper salt: reinforces the natural bite
🧑🏽🍳 Common mistake
Cutting thick slices and trying to fix it with salt. If the texture is off, no amount of seasoning will correct it. Slice thinner.
Roasted, Grilled or Pan-Cooked, Turnips
Cut turnips into wedges or chunks and cook them hot enough to colour. Done right, the edges darken and taste slightly nutty, while the centre stays soft and mild.
If they sit too close together or the heat is too low, they release water and turn pale. At that point, you lose both texture and flavour, no salt will fix it.
When to add finishing salt on roasted, grilled or pan-cooked turnips: At the end, after cooking.
How much salt to use: Light to moderate.
Best finishing salts roasted, grilled or pan-cooked cooked turnips:
- flaky mineral salt: for roasted turnips with browned edges
- butter salt: fits pan-cooked or mashed turnips
- nutmeg salt: works in mashed or puréed turnips
👨🏼🍳 Food science insight
Turnips contain glucosinolates, compounds that give a mild bitterness. Heat reduces their sharpness, but also weakens overall flavour. Salt helps rebalance that by lifting sweetness and tightening the remaining structure.
How to Use Finishing Salt on Avocado
A ripe avocado spreads across the palate like butter. Dense, smooth, slightly nutty, with a richness that builds as you eat it.
It’s one of the few vegetables that eats like fat. That’s why it goes flat so quickly. After a few bites, everything blurs into one soft, heavy note.
Salt is what cuts through that and keeps each bite distinct. Cut first, then season immediately. Avocado oxidises fast, and once the surface dulls, salt reads flatter too. Fresh cut and immediate seasoning gives you a brighter, cleaner hit.

When to add finishing salt on avocado: Immediately after cutting or mashing, just before serving.
How much salt to use: Light to moderate, adjusted to how evenly it’s distributed.
Best finishing salts for avocado:
- flaky mineral salt: for halves or thick slices, gives clean contrast
- lime zest salt: for sliced avocado with olive oil or chilli
- chilli salt: for cubed avocado in salads, tacos, or grain bowls
- black garlic salt: for mashed avocado, adds depth without breaking the texture
👨🏼🍳 Food science insight
Fat coats the tongue and slows flavour perception. Salt interrupts that coating, which is why properly seasoned avocado tastes lighter and more defined even though nothing about it is light.
How Finishing Salt Works Across Different Ingredients
Vegetables show how finishing salt responds to water, structure, and heat. The same principles apply across ingredients, but the result changes depending on moisture, fat, and texture.
At Maison Kojira we explore these flavour principles across different ingredients, with practical guides that show how finishing salt behaves in real cooking.
Meat and Seafood
→ How to Use Finishing Salt on Meat
→ How to Use Finishing Salt on Seafood
Vegetables
→ How to Use Finishing Salt on Vegetables
→ How to Salt Tomatoes
→ How to Salt Asparagus
→ Do You Need to Salt Aubergine or Eggplant?
Starches and Grains
→ How to Use Finishing Salt on Potatoes
→ How to Salt Grain Salads
→ How to Salt Pasta
→ How to Salt Rice
→ How to Salt Risotto
Simple Foods
→ How to Use Finishing Salt on Simple Foods
Fruits and Desserts
→ Salt on Fruit
→ Salt on Desserts
Can you add finishing salt before roasting vegetables?
No, don’t do that. Salt added before roasting pulls out moisture, which leads to steaming instead of browning. For crisp edges and deeper flavour, add finishing salt after cooking.
Which vegetables benefit most from finishing salt?
High-water and roasted vegetables benefit the most — tomatoes, mushrooms, eggplant, zucchini. Salt enhances their natural sweetness and balances bitterness.
Why do roasted vegetables sometimes taste flat even with salt?
Salt alone is not enough. Vegetables need contrast – acid, bitterness, or sweetness – to fully open up flavour.
Finishing salt enhances flavour, but it works best alongside elements like lemon, vinegar, or caramelisation. Blended salts that already contain citrus, fermented or aromatic components can bring that contrast in a single step.
How do you fix vegetables if you’ve added too much salt?
Dilute or rebalance—don’t try to “remove” it.
Add unsalted components: more vegetables, grains, or legumes
Use fat (olive oil, butter, yogurt) to soften the impact
Add acid (lemon, vinegar) to redirect the flavour
For roasted or sautéed veg: serve with something plain alongside
Once salt is on the surface, you can’t undo it. You can only spread it out or balance it.
Does the quality of salt matter for vegetables?
Yes. You taste it directly, so the difference is obvious.
Use a clean-tasting salt with a texture that fits the dish. If the salt is harsh or dusty, it shows immediately, there’s nothing to hide behind.